Frank House

Frank House on Making a Chasing Hammer

Frank House originally shared this post on the CLA facebook page

Alright Engravers,

Time to think about chasing hammers!

FHouse_ChasingHammer_1

The idea here is to use a very light hammer (mine weighs in at 2.9 oz) with a thin flexible handle as the lighter and faster taps will not only yield a finer and more consistent cut, your gravers will hold out far longer with less breakage of your tip. (More on that later)

To get started, I use machinable brass

and have posted at least one source for 1" stock (photo)

Machine the head to the dimensions provided in the drawing and bore a 3/8" (.375) eye for the handle and then, using a tapered reamer relieve the eye slightly from both the top and bottom so that the handle will "swage" itself into place with a wooden wedge.

FHouse_ChasingHammer_2
FHouse_ChasingHammer_3
FHouse_ChasingHammer_4
FHouse_ChasingHammer_5
FHouse_ChasingHammer_6
FHouse_ChasingHammer_7

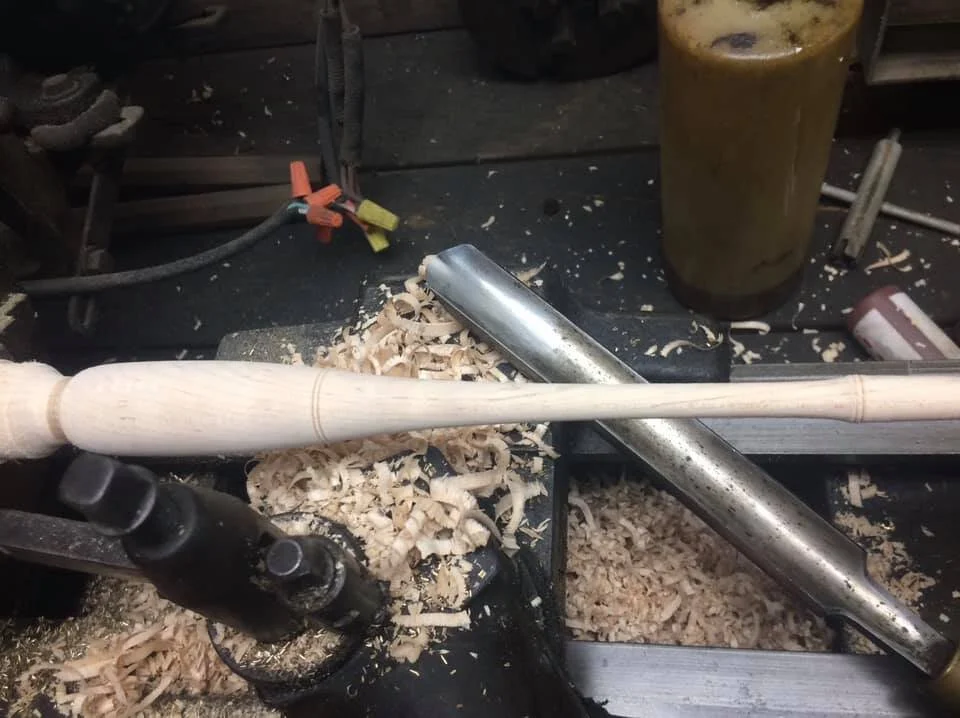
The handle dimensions are 1" diameter at the butt or grip end, .300" at the neck or smallest portion and

.400" at the portion that goes through the eye with a slight taper to .375" or 3/8".

I have as well listed a chasing hammer along with the contact info (photo) from Rio Grande that will suffice.

Next up, shaping the graver and sharpening!

Upwards and onwards!

FHouse_ChasingHammer_8
FHouse_ChasingHammer_9

Frank House on executing Engraved Script

Frank House originally shared this post on the CLA facebook page

Alright Engravers,

Time to take a big next step in grasping the concept of executing script engraving.....

90234374_1067789803577609_8392498364196847616_n.jpg

First of all, it's important to understand the concept of shading... this where the Art of engraving comes to the fore.

Executed deftly, the work has that wonderful, yet subtle "Pop" that even great calligraphy can't quite match.

This next exercise is learning to draw your characters as if you would engrave them.... in other words, refine your script as if it is finished, shaded and detailed.

Script is basically cut from two directions, up-cuts and down-cuts, taking advantage of ones natural ergonomic abilities. Simply stated, it's far easier to control your cuts if executed on a outside arc than one on a inside arc, therefore the work is accomplished from two directions(photos).

90498826_1067789670244289_7407060273233657856_n.jpg
90471591_1067789770244279_1197817270198337536_n.jpg
90673473_1067789733577616_7695382840858378240_n.jpg

The graver is started vertical and rolled away to the outside of the cuts as one proceeds, rolling the graver both back vertically and out to finish the cut, accomplishing the shading on curved cuts.

Vertical cuts are somewhat simpler.

Gradually allow the graver to consistently cut deeper until the finished depth and result are achieved.

The exercise here is to draw and lay-out your design as if you were engraving it. Incorporate the shading, incorporate the up and down cuts as you lay your work drastically speeds the process and helps one to grasp the concept.

90291958_1067789826910940_3582694188828852224_n.jpg

I'm certain folks will have questions, I'll do my best....

Stay with me, we'll get there.

Upwards and onwards!